Loading......

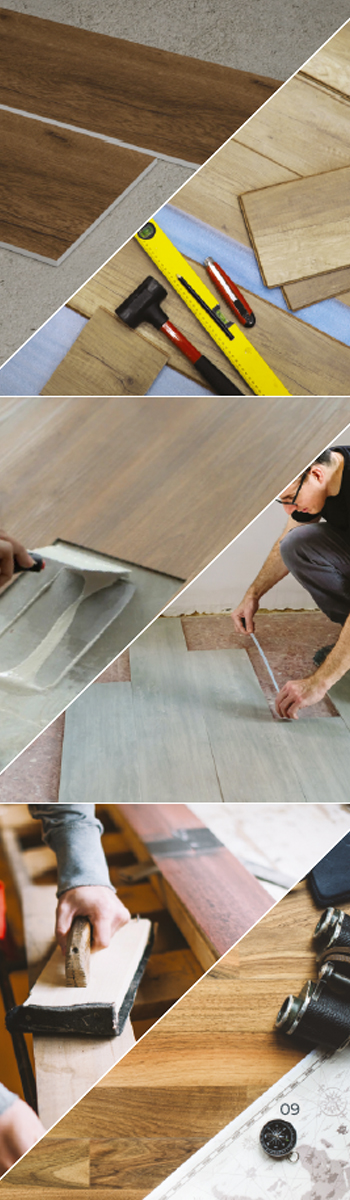
INSTALLATION INSTRUCTIONS

MATERIALS AND TOOLS NEEDED:

  • Coreflexx planks.
  • Recommended Adhesive for Coreflexx Planks: Fevicol SR 505.
  • Notched trowel.
  • Utility knife.
  • Measuring tape.
  • Straight edge or T-square.
  • Chalk line.
  • Roller.
  • Cleaning supplies (vacuum, mop, and bucket).


INSTRUCTIONS:

    1. Prepare the Subfloor

  • Clean the Subfloor: Ensure the subfloor is clean, dry, and free of any dust, debris, or grease.
  • Level the Subfloor: Use a leveling compound to fill in any low spots and sand down any high spots.The subfloor should be flat within 1/8 inch over 10 feet.
  • Check for Moisture: Ensure the subfloor is dry. For concrete subfloors, conduct a moisture test as excessive moisture can prevent the adhesive from bonding properly.
  • 2. Acclimate the Coreflexx Planks

  • Allow the coreflexx planks to acclimate to the room temperature and humidity for at least 48 hours before installation. Store the planks flat and not stacked.
  • 3. Plan the Layout

  • Determine the Center of the Room: Use a chalk line to mark the center of the room, dividing it into four quadrants.
  • Dry Lay the Planks: Place the planks without adhesive to plan the layout. This helps to determine the best starting point and to ensure that cut planks at the edges will be of equal size for a balanced look.
  • 4. Apply the Adhesive

  • Start in a Corner: Begin in the corner of the room and work in small sections.
  • Spread the Adhesive: Use a notched trowel to spread the adhesive evenly over a small area where you will start laying the planks. Follow the adhesive manufacturer’s instructions for the correct notched trowel size and application technique.
  • Wait for Tackiness: Allow the adhesive to become tacky (as per manufacturer’s instructions) before placing the planks.
  • 5. Lay the Planks

  • Place the Planks: Start laying the planks from the center line, pressing them firmly into the adhesive. Align the edges tightly and use a utility knife to trim the planks as needed.
  • Roll the Planks: Once a section is complete, use a roller to press the planks firmly into the adhesive to remove any air bubbles and ensure a good bond.
  • 6. Continue the Installation

  • Work in Sections: Continue spreading adhesive and laying planks in manageable sections until the entire floor is covered.
  • Check Alignment: Regularly check that the planks remain aligned and adjust as necessary.
  • 7. Finish the Edges and Trim

  • Trim the Edges: Use a utility knife to cut the planks to fit along the edges and around obstacles. Install Molding and Transitions: Install baseboards, molding, and transition strips as needed to complete the installation and cover the expansion gaps.
  • 8. Post-Installation

  • Clean the Floor: Clean any excess adhesive from the surface of the planks.
  • Allow the Adhesive to Cure: Avoid heavy traffic on the floor for at least 24-48 hours to allow the adhesive to cure properly.

KEY POINTS FOR QUICK & EASY INSTALLATION

  • Always follow the manufacturer's instructions for both the LVT planks and adhesive.
  • Maintain consistent temperature and humidity levels in the installation area.
  • Regularly check for proper adhesive tackiness and plank alignment.

COREFLEXX PLANK PATTERN

use Form's well-balanced size options to create impact quickly with simple, timeless pattern options. Plank tiles, which are typically used on the floor, can be laid in a variety of patterns, helping to create a unique flooring design.

BASKET WEAVE PATTERN

STRIPWOOD PATTERN

HERRINCEBONE PATTERN

STEPLADDER PATTERN

Back To Top